These fun and spooky Spider Oreo Cupcakes are such a fun treat to make with kids! Little hands can bake and decorate these cupcakes easily, making legs with candy and adding eyes.
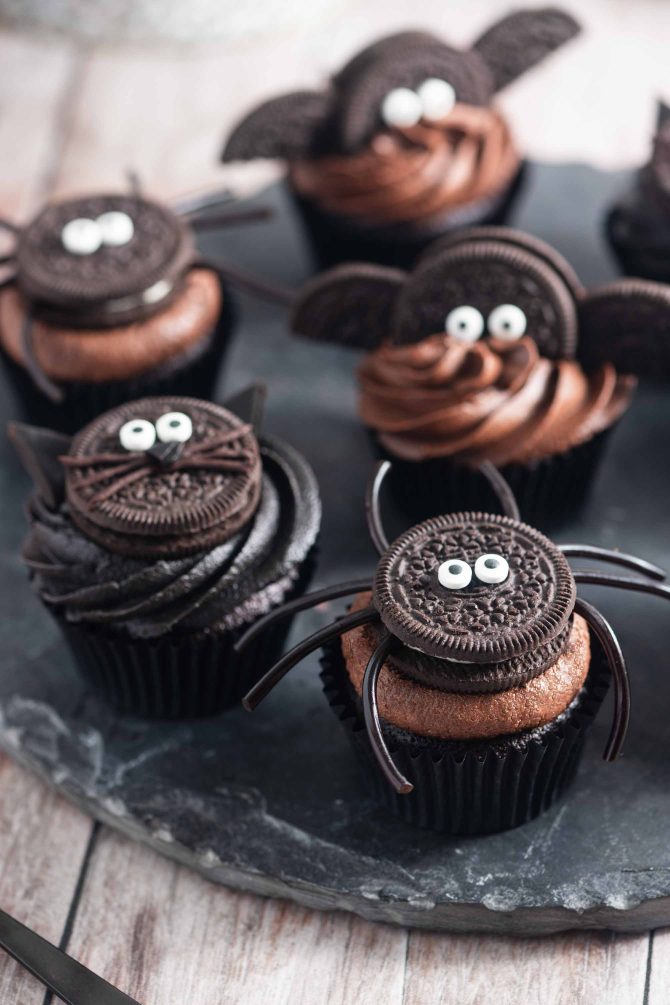
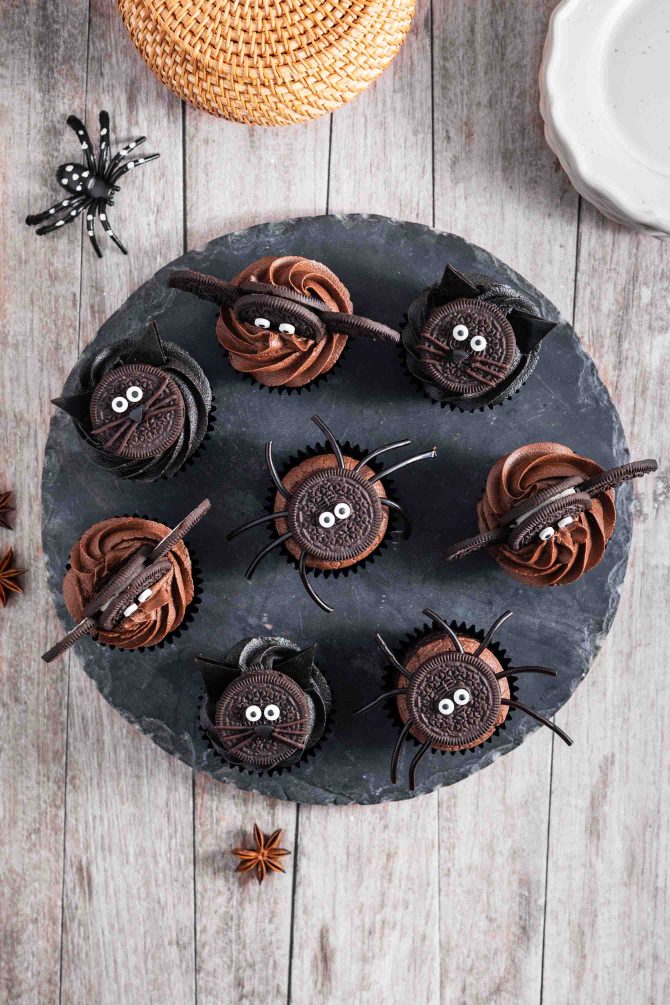
These spider cupcakes are the perfect mix of spooky and sweet! They’re made with fluffy chocolate cupcakes topped with silky cocoa buttercream and decorated with Oreo spiders — complete with candy legs and eyes! They’re fun to make, delicious to eat, and absolutely perfect for a kids’ Halloween party or a cozy October night in.
I love baking Halloween cupcakes with my girls. It’s such a fun family tradition, and the kids love decorating their own creepy creations. Some spiders end up cute, others a little crazy, but they all taste amazing!
Why You’ll Love These Halloween Cupcakes
There are so many reasons these cupcakes will be a hit:
They’re easy to make, fun to decorate, and totally delicious.
You get rich, chocolatey cupcakes with fluffy, smooth buttercream.
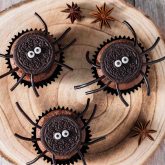
Each cupcake is topped with adorable Oreo spiders that everyone loves.
They look super creative — no fancy tools or skills required!
These Halloween spider cupcakes start with moist chocolate cupcakes and a light, fluffy buttercream. For the decorations, you’ll need:
Oreos: The body of the spider.
Candy legs: Cut into small pieces to make the legs. See suggestions for candy options below.
Sugar eyes: For that spooky-but-cute spider look.
Royal icing: Used as “glue” to stick the eyes onto the Oreos.
Ideas for candy legs:
Licorice is a big thing here in Denmark, so I made spider legs using licorice lace that I cut into pieces. If you’re somewhere else in the world and want to replicate the licorice legs, you could use:
Black Twizzlers (pull them apart)
Black Shoestring Licorice, sometimes abeled “black licorice laces” (brands like Darrell Lea or Wiley Wallaby)
If you want to avoid licorice or can’t find them:
String candy or sour laces. Brown (cola), purple (grape) or red (strawberry) would work really well!
Thin pretzel sticks dipped in chocolate for a totally different look and texture.
How to Make Oreo Spiders
Start by baking your cupcakes and letting them cool completely.
While they are cooling, make a small batch of royal icing. This will be your edible glue for the spiders.
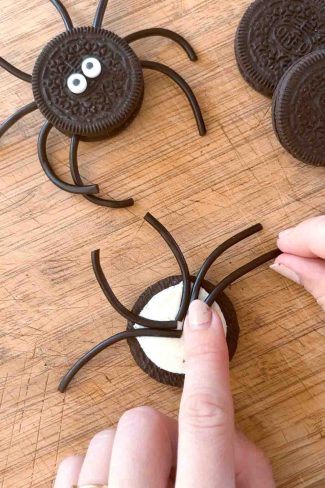
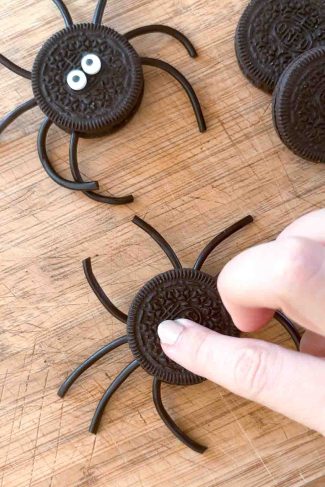
Gently twist the tops off your Oreos. Cut eight short pieces of candy for the legs, then press them into the cream filling, four on each side. Pipe a bit of royal icing on the middle and place the Oreo top back on. Pipe a tiny bit of icing to “glue” on two candy eyes.
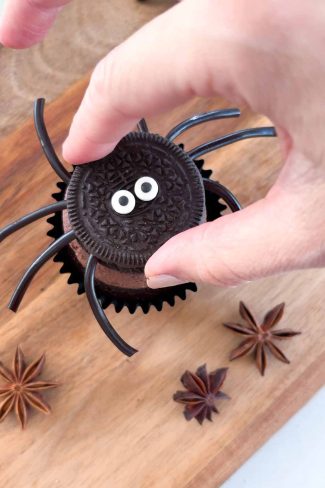
Pipe chocolate buttercream onto your cooled cupcakes, then press an Oreo spider on top. That’s it! Simple, fun, and perfect for little hands to help with.
Halloween Cupcakes as a Fun Kids’ Activity
These spider cupcakes are one of my favorite Halloween baking projects to do with our kids. I set out bowls of Oreos, licorice, and candy eyes, and let the girls design their own spiders. Some look adorable, some are hilariously scary, and all of them make us laugh. It’s the perfect cozy family activity on a chilly October day.
Storage and Make-Ahead Tips
You can bake the chocolate cupcakes a day ahead and store them in an airtight container at room temperature. They can also be made well in advance and frozen for up to 3 months.
The buttercream can also be made in advance, just keep it refrigerated and re-whip it before using.
You can even assemble the Oreo spiders up to a week ahead! Store them in an airtight box and place them on the cupcakes the same day you plan to serve. Otherwise, the Oreos will soften from the frosting.
Finished cupcakes can be stored in the fridge for up to 1 day. Bring them to room temperature 30 minutes before serving for the best flavor and texture.
Frequently Asked Questions
Can I use something other than Oreos?
Yes! Any sandwich cookie with cream filling will work, as long as you can separate the halves to attach the legs. Vanilla Oreos work great as well, for light brown spiders.
Can I make them without licorice?
Absolutely. You can use string candy or sour belts instead.
Are these kid-friendly to make?
Yes! These are some of the most fun Halloween cupcakes for kids. They can stick on legs, add the eyes, and decorate their own spooky spiders.
Which frosting works best?
Chocolate buttercream is perfect because it’s creamy, holds its shape, and helps the Oreo spiders stick firmly on top. Also its liquid content is not too high to make the Oreos go soft quickly.
Can I freeze the cupcakes?
The chocolate cupcakes can be frozen (without frosting) for up to 3 months. Decorate them after thawing so they look fresh.
Recipe
Halloween Spider Cupcakes with Candy Legs
No ratings yet
Fun chocolate cupcakes decorated with Oreo spiders and candy eyes — spooky, cute, and perfect for kids to help decorate!
Sift together flour and cocoa powder in a large bowl. Add sugar, baking powder, vanilla, and salt, and whisk to combine.
150 g all-purpose flour, 50 g unsweetened cocoa powder, 200 g sugar, 1 tbsp baking powder, 1 tsp vanilla extract, ½ tsp salt
Add the egg, milk, and oil, and stir with a spoon or spatula until smooth. Pour in the hot coffee and mix until the batter is thin and even.
1 egg, 100 ml milk, 75 ml vegetable oil, 100 ml hot coffee
Divide the batter evenly into 12 cupcake liners placed in a muffin tin. Bake at 180 °C (356 °F) for 15–17 minutes or until a toothpick inserted in the center comes out clean.
Let the cupcakes cool completely on a wire rack before decorating.
Chocolate Buttercream:
Prepare the chocolate buttercream following my recipe for Cocoa Chocolate Buttercream.
½ batch of my Cocoa Chocolate Buttercream
Fill the buttercream into a piping bag fitted with a large round tip (about 1 cm / ⅜ inch).
Royal Icing:
Whisk together powdered sugar and egg white until smooth and slightly runny. This will act as edible glue for the spider decorations.
30 g powdered sugar, 1 tsp egg white
Decorating:
Cut the candy laces into short pieces for spider legs.
4-5 candy laces
Gently separate each Oreo using a sharp knife. Press eight licorice legs into the cream filling — four on each side. Add a small dab of royal icing in the center and place the top cookie back on.
12 Oreos
Dip the sugar eyes into a little royal icing and “glue” them onto the Oreo top (a pair of tweezers helps!).
24 sugar eyes
Pipe buttercream on each cooled cupcake. Hold the piping bag vertically over the center and press until a smooth mound forms.
Gently press an Oreo spider on top of each cupcake so it sticks to the frosting.
RATE THE RECIPE
Tag @bageglad på Instagram så jeg kan se og dele det du har lavet!
Hi, I’m Trine – home baker from Copenhagen, Denmark. “Bageglad” means happy to bake in Danish and I have been spreading this happiness on the blog since 2012. Today, it reaches more home bakers worldwide than I could ever have dreamed of! Thank you for visiting!
Hi, I’m Trine – home baker from Copenhagen, Denmark. “Bageglad” means happy to bake in Danish and I have been spreading this happiness on the blog since 2012. Today, it reaches more home bakers worldwide than I could ever have dreamed of! Thank you for visiting!


 Prep Time 40 minutes
  Difficulty: Moderate
 Yield: 12 cupcakes


