If you're looking to impress friends, family or colleagues with a beautiful and festive cake but you don't want to spend a long time creating it, you'll want to read on! This beautifully decorated chocolate sheet cake is easy to make and is sure to bring a smile to everyone's face.
A Festive Chocolate Sheet Cake
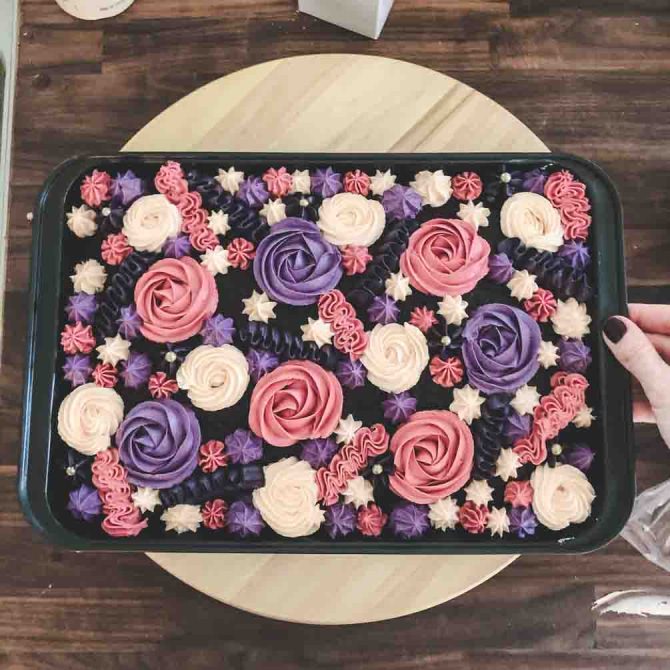
One of the best things about cakes and desserts is that you can decorate them! Color can turn even the simplest of cakes into something beautiful and festive. Today, I’m excited to share an easy way to make a delicious chocolate sheet cake shine with lots of colors, perfect for celebrating a special occasion or just treating your colleagues, friends, or family.
I wanted to bake a cake for my 7-year-old niece that would look amazing but still have a simple, crowd-pleasing flavor. So I baked a quick and easy chocolate sheet cake and went all out on colorful frosting! My niece loves vanilla buttercream, so I covered the entire cake with vibrant, colorful buttercream for a fun and festive look for her birthday party.
Bake an Easy Chocolate Sheet Cake
Even though this sheet cake is so easy to make, it’s still absolutely delicious! It’s wonderfully moist and fluffy, and the main reasons for this is the balance of ingredients plus the addition of oil, which helps make the chocolate sheet cake extra moist. I baked my cake in a standard 23 x 33 cm (9 x 13 inch) baking pan. If you’re baking for a larger group, this recipe is easy to double and bake in multiple pans—definitely a great go-to recipe to keep in your collection!
Baking tip
It’s important to let the chocolate sheet cake cool completely after baking. If it’s even slightly warmer than room temperature, it will melt the buttercream when you start decorating. So, be patient and wait! In the meantime, you can plan out how you want to decorate your sheet cake.
Coloring Your Buttercream
The decoration on this chocolate sheet cake mainly consists of whipped vanilla buttercream. I added some small gold chocolate balls, and you can easily add sprinkles, flowers, or other sugar decorations as well. Here are some tips for getting your colors just right:
Mix the buttercream in one large batch, then divide it into separate bowls for each color you plan to use.
Always use gel food coloring—liquid colors aren’t as powerful so you’ll need to use more, which can affect the flavor and texture because you may end up adding too much liquid.
Add color a little at a time. Gel colors are highly concentrated, and it’s easy to overdo it!
Keep in mind that buttercream colors will darken slightly as they set.
Color all your buttercream portions before you start decorating, but consider keeping a small amount of uncolored buttercream as a backup in case you need more.
Cover the bowls with plastic wrap as soon as you’re done mixing the colors to prevent the buttercream from forming a crust. Alternatively, you can transfer the buttercream directly into piping bags with tips so they’re ready to use.
Helpful Tips for Piping Buttercream on Sheet Cakes
Piping buttercream is easy and fun, and the possibilities for decorating your sheet cake are endless. Here are a few helpful tips:
The buttercream should be stiff enough to hold its shape but soft enough to pipe smoothly without requiring too much pressure. You can adjust the consistency by adding more powdered sugar or milk—experiment until you get it just right.
Plan out your design beforehand, either in your head or with a quick sketch.
Distribute the elements evenly so the colors and patterns are balanced for the best-looking result.
Start with the larger elements, like roses, and finish with the smaller details.
Hold the piping bag vertically or at a slight angle while piping.
If the buttercream becomes too soft while you’re working, pop it in the fridge until it reaches the right temperature again.
I find it helpful to place the cake on a turntable while piping, so I can easily rotate it as I work (shown in the photos below)
Recommended Piping Tips
There are no strict rules about which piping tips to use for your sheet cake. Just dive in and experiment! However, if you want to recreate the sheet cake exactly as I’ve done in the photos, these are the tips I used:
A simple, moist chocolate cake decorated in the best way—with lots of delicious vanilla buttercream! The buttercream is piped in multiple colors and shapes, covering the entire cake for a festive look.
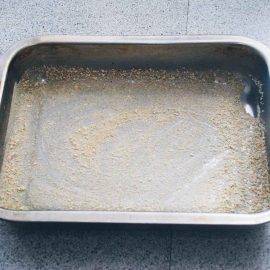
Grease a baking pan, approximately 23 x 33 cm (9 x 13 inches).
In a large bowl, mix flour, cocoa powder, baking soda, and salt.
200 g flour, 100 g cocoa powder, 1 tsp baking soda, ¼ tsp salt
In another bowl, whisk together oil, sugar, vanilla and eggs. Add buttermilk and mix well.
1 ½ dl vegetable oil, 350 g sugar, 1 ½ tsp vanilla, 3 eggs, 2 ½ dl buttermilk*
Gradually pour the wet ingredients into the flour mixture, stirring gently with a spatula or wooden spoon until combined. Be careful not to overmix.
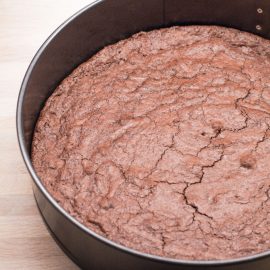
Bake at 180 °C (356 °F) for 28-30 minutes. The cake is done when a toothpick inserted in the center comes out clean.
Let the cake cool completely in the pan on a wire rack.
Vanilla Buttercream:
Place butter in a mixing bowl (or the bowl of a stand mixer) and beat on medium speed for about 5 minutes until fluffy.
350 g butter
Add powdered sugar and vanilla, mixing until combined.
450 g powdered sugar, 1 tsp vanilla
Slowly add heavy cream, one tablespoon at a time, until you reach the desired consistency.**
2-3 tbsp heavy cream
Divide the buttercream into separate bowls, one for each color you want to use. Color the buttercream with gel food coloring (add a little at a time, as gel colors are strong!). Cover the bowls with plastic wrap to prevent drying.
Fill piping bags with different buttercream colors and pipe decorations onto the cake using various piping tips. Optionally, decorate with sprinkles or other edible decorations.
Notes
*If you don’t have buttermilk, you can substitute by mixing 2 tbsp lemon juice into regular milk and letting it sit for 10 minutes.**For firmer buttercream, add more powdered sugar. For softer buttercream, add more heavy cream. The buttercream should hold its shape but still be soft enough to pipe without excessive pressure.Storage: The decorated cake should be covered with plastic wrap and stored in a cool place. Avoid refrigeration unless storing overnight. If refrigerated, bring the cake to room temperature before serving so the buttercream softens.
RATE THE RECIPE
Tag @bageglad på Instagram så jeg kan se og dele det du har lavet!
Hi, I’m Trine – home baker from Copenhagen, Denmark. “Bageglad” means happy to bake in Danish and I have been spreading this happiness on the blog since 2012. Today, it reaches more home bakers worldwide than I could ever have dreamed of! Thank you for visiting!
Hi, I’m Trine – home baker from Copenhagen, Denmark. “Bageglad” means happy to bake in Danish and I have been spreading this happiness on the blog since 2012. Today, it reaches more home bakers worldwide than I could ever have dreamed of! Thank you for visiting!


 Time: 3 hours
  Difficulty: Moderate
 Yield: 16 personer


